
DIY Crochet, we love DIY and Crochet hand works
 Disclaimer: This post includes affiliate links; materials provided by Yarnspirations and Furls.
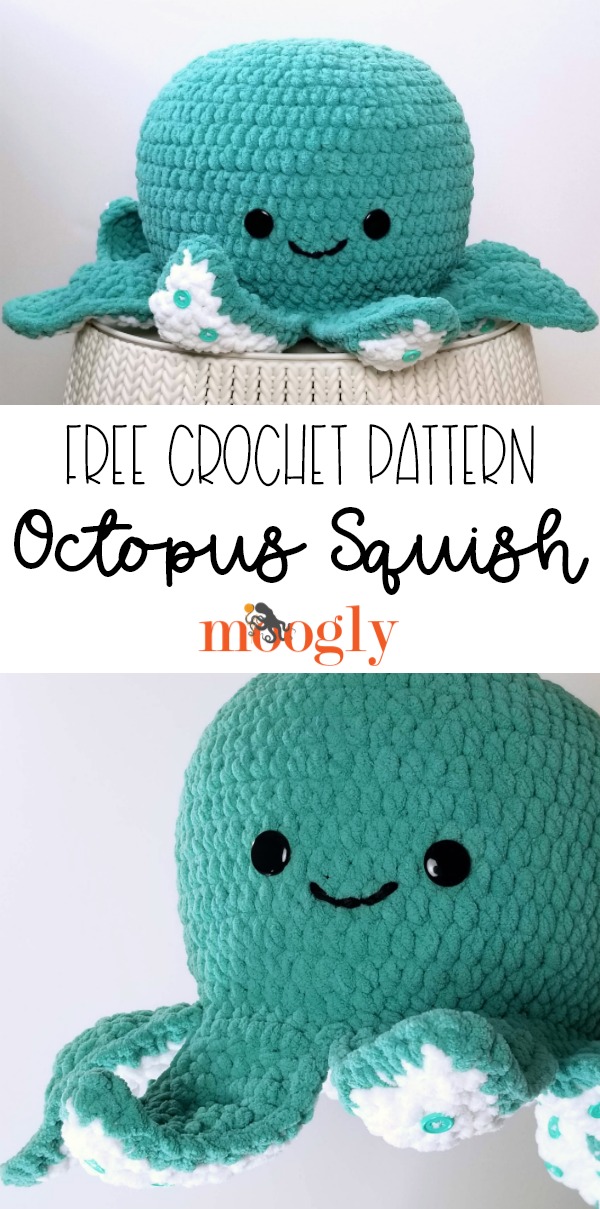
SUPER QUICK SQUISH!
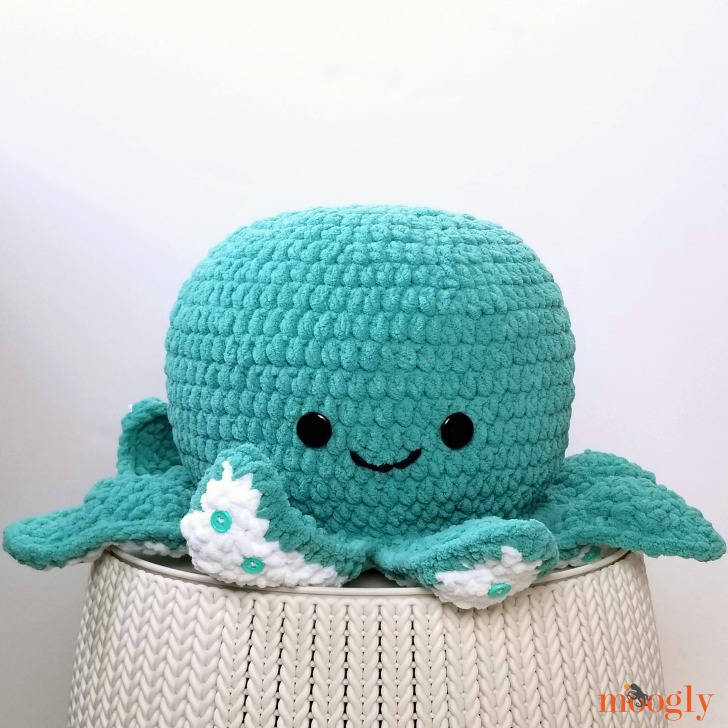
The Octopus Squish is filled with a microbead pillow ball, making it addictively huggable! And by using Bernat Blanket, it works up pretty darn quickly too – and is just as soft as can be! If you prefer, of course, you can fill it with Fiberfill.

CUTE AND CUDDLY
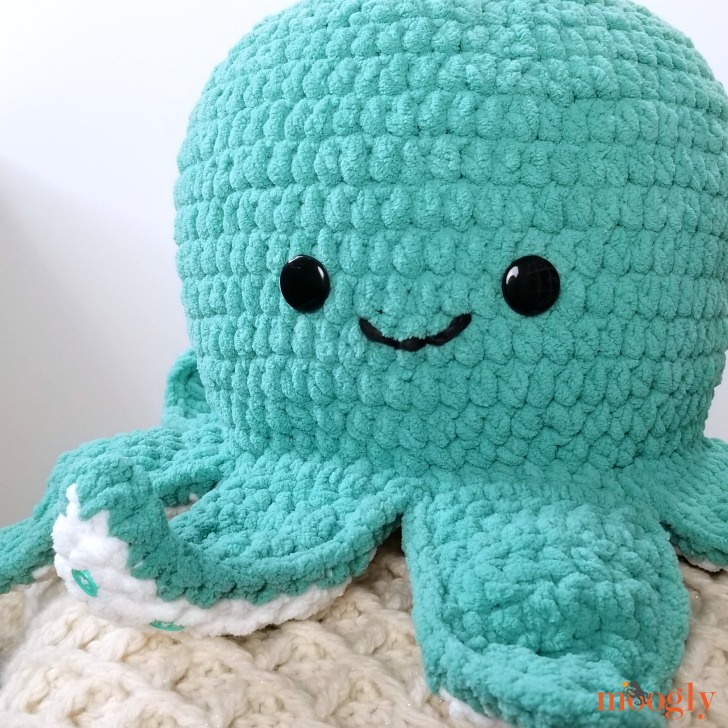
I had so much fun crocheting this octopus pillow! I love his cute little face and wiggly tentacles! You can make this little guy your own with yarn and button choices, and how you sew on the face.

A NOTE ON TOYS FOR KIDS
While the Octopus Squish itself is too big for babies to choke on… the buttons are not. This pattern has not been tested for safety for children under 3 years of age. If you are crocheting it for a baby or toddler, please embroider on the face and tentacle suckers rather than using buttons. If using it as a photo prop, be sure not to leave the toy with a baby unattended.


OCTOPUS SQUISH
US-L, 7.0 mm hook –
320 yds (6 – Super Bulky/UK: 14-16 ply; 100% polyester; 300g/10.5 oz; 201 m/220 yds)
Color A: Light Teal (220 yds, 1 ball)
Color B: White (100 yds, 1 ball)
12″ (30 cm) worsted weight black yarn
40+ ½” (12mm) teal buttons (My Favorite Colors, JOANN)
2 ⅞” (22mm) black buttons (La Mode, JOANN)
10″ Round Microbead Pillow (blue) –
Stitch Markers
Coats Sewing Thread – White
Gauge: 4″/10cm across after Rnd 3.
Size: 10″ around excluding tentacles
NOTES:
Rnds 1 – 18 are worked in a spiral.
Do not ch 1 at the beginning of Rnds 2-19, and do not join any rnds with a sl st.
Move a stitch marker along the first st of each rnd as you work to keep track of your progress.
INSTRUCTIONS:
BODY
Rnd 1: With Color A, make a magic circle, ch 1, sc in the ring, 9 hdc in the ring. (10 sts)
Rnd 2: 2 hdc in each st around. (20 hdc)
Rnd 3: *Hdc in the next st, 2 hdc in the next st; rep from * around. (30 hdc)
Rnd 4: *2 hdc in the next st, hdc in the next 2 sts; rep from * around. (40 hdc)
Rnd 5: *Hdc in the next 3 sts, 2 hdc in the next st; rep from * around. (50 hdc)
Rnd 6: *Hdc in the next st, 2 hdc in the next st, hdc in the next 3 sts; rep from * around. (60 hdc)
Rnd 7: Hdc in the next 5 sts, 2 hdc in the next st, *hdc in the next 9 sts, 2 hdc in the next st; rep from * until 4 sts rem, hdc in last 4 sts. (66 hdc)
Rnd 8: *2 hdc in the next st, hdc in the next 10 sts; rep from * around. (72 hdc)
Rnd 9: Hdc in the next 8 sts, 2 hdc in the next st, *hdc in the next 17 sts, 2 hdc in the next st; rep from * until 9 sts rem, hdc in last 9 sts. (76 hdc)
Rnd 10 – 15: Hdc in each st around.
Rnd 16: *Hdc in next 17 sts, hdc2tog; rep from * around. (72 hdc)
Rnd 17: Hdc in next 4 sts, hdc2tog, *hdc in next 7 sts, hdc2tog; rep from * around until 3 sts rem, hdc in last 3 sts. (64 sts)
Rnd 18: *Hdc2tog, hdc in next 6 sts; rep from * around. (56 sts) – DO NOT BREAK YARN.
TENTACLES
Tentacle #1:
Row 1: Hdc in next 7 sts; turn (rem sts left unworked). (7 hdc)
Row 2 – 4: Ch 1, hdc in each st across; turn.
Row 5: Ch 1, 2 hdc in the first st, hdc in the next 4 sts, hdc2tog; turn.
Row 6: Ch 1, hdc2tog twice, hdc in next 2 sts, 2 hdc in the last st; turn. (6 hdc)
Row 7: Ch 1, 2 hdc in the first st, hdc in the next st, hdc2tog twice; turn. (5 hdc)
Row 8: Ch 1, hdc2tog, hdc in next st, hdc2tog; turn. (3 hdc)
Row 9: Ch 1, hdc in the first st, hdc2tog; turn. (2 hdc)
Row 10: Ch 1, hdc2tog; break yarn and finish off. (1 hdc)
Tentacles #2 – 8:
Row 1: Join to next st of Rnd 18, ch 1, hdc in same st and next 6 sts; turn. (7 hdc)
Row 2 – 10: Rep as for Tentacle #1. Weave in all ends. Set piece aside.

UNDERBELLY
Rnd 1 – 5: With Color B, rep Rnd 1 – 5 of Body. (50 hdc)
Rnd 6: *(Hdc in next 7 sts, 2 hdc in the next st) twice, hdc in next 8 sts, 2 hdc in the next st; rep from * around. (56 hdc) – DO NOT BREAK YARN.
UNDER-TENTACLES
Under-Tentacle #1:
Row 1: Hdc in next 7 sts; turn (rem sts left unworked). (7 hdc)
Row 2 – 4: Ch 1, hdc in each st across; turn.
Row 5: Ch 1, hdc2tog, hdc in the next 4 sts, 2 hdc in the last st; turn.
Row 6: Ch 1, 2 hdc in the first st, hdc in next 2 sts, hdc2tog twice; turn. (6 hdc)
Row 7: Ch 1, hdc2tog twice, hdc in the next st, 2 hdc in the last st; turn. (5 hdc)
Row 8: Ch 1, hdc2tog, hdc in next st, hdc2tog; turn. (3 hdc)
Row 9: Ch 1, hdc2tog, hdc in the last st; turn. (2 hdc)
Row 10: Ch 1, hdc2tog; break yarn and finish off. (1 hdc)
Under-Tentacles #2 – 8:
Row 1: Join to next st of Rnd 18, ch 1, hdc in same st and next 6 sts; turn. (7 hdc)
Row 2 – 10: Rep as for Under-Tentacle #1. Weave in all ends.
ASSEMBLY
Add the Suckers to the Tentacles: Sew the teal buttons to the Under-Tentacles as shown (5 per tentacle).

Create the Face: Sew the black buttons to the Body for eyes and sew on a smile using the short length of black yarn.

Prep for Finishing: Insert the Pillow into the Body, then match up the Tentacles and Under-Tentacles. Making sure that all buttons are facing out, use stitch markers to secure the pieces together.


Final Seam: Using Color A, sc through Tentacles and Under-Tentacles from the Body side of the project, working evenly around the entire body. Use Seamless Finishing to join, break yarn and weave in end.
If this pattern inspires you to make your own project, and you post a photo on social media, be sure to tag me @mooglyblog or #mooglyblog so I can check it out too!