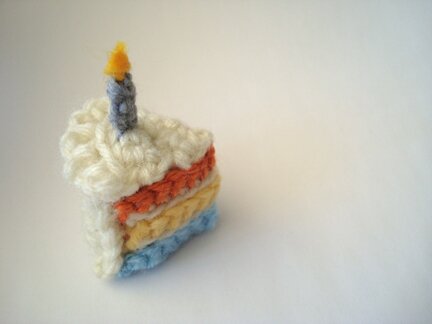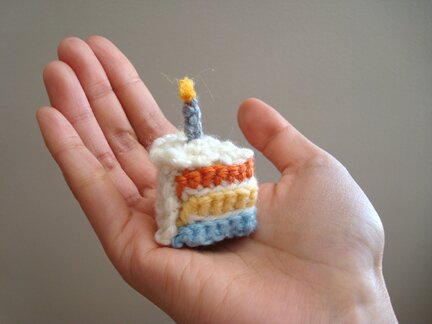
I promised to come back with another celebratory plush pattern — and of course, it’s the rainbow cake slice pictured in the blogiversary posts here, and here!
You may notice that it shares the same colour palette as the plush clutch 😀 It is also based on my moon cake pattern, with a colourful twist.
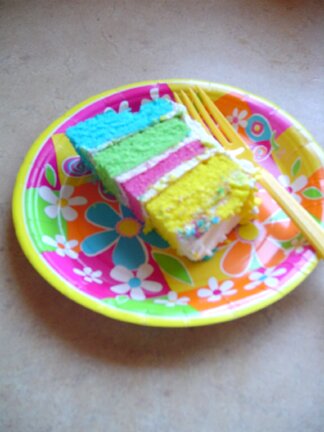
I’ve had the good fortune of having a slice of rainbow cake at my sister-in-law’s bridal shower. And I must say, it tasted… like any other piece of cake. It was certainly delicious, but if I were to eat it with my eyes closed I probably wouldn’t say that it’s a pastry masterpiece. BUT I didn’t eat it with my eyes closed, and it was amazing. Look how vibrant the colours are! (Please excuse the blurriness of the picture — that was before I got a camera with a macro mode.)
Because I’m kind of a visual person, I’d say that this rainbow cake was the second best cake I’ve ever had. (The best is the Swiss rolls from the Chinese bakery of the green tea variety, both colourful and delicious. I’d highly recommend trying it if you haven’t already.)
And if you’d like to make some real edible rainbow cake, here’s a recipe. One can even make some rainbow pudding! Looks like a trip to the baking aisle is in order.
In the meanwhile, if you’d like to make the crochet (inedible, but cute!) rainbow cake, here’s how it’s made — all you need is some yarn, some free time, and some love.
Yarn: bits of worsted weight yarn in blue, yellow, orange, white, and grey. (I just used these colours to match the plush clutch, but you can use whatever colours that strike your fancy. Scraps are great for this project.)
Hook: 3.5mm
Other stuff: sewing needle, stuffing, white glue
Top: with white
Row 1: ch 2, 2 sc in second ch from hook, ch 1, turn.
Row 2: sc in first sc, 2 sc in next sc, ch 1, turn.
Row 3: sc in first sc, 2 sc in next sc, sc in next sc, ch 1, turn.
Row 4: sc in first sc, 1 sc and 1 hdc in next sc, hdc in next sc, sc in next sc, ch 1, turn.
CORRECTED! Row 5 (ruffles): ch 2, in front back loop only, sl st in 1st sc, [ch 2, sl st in next st in front back loop only] 4 times. Leave a long tail for sewing, fasten off.
Bottom: with blue (or whatever the colour of the bottom layer of cake is)
Follow pattern for row 1–4 of top of cake slice. Fasten off.
Back: with white
Row 1: ch 6, sc in second ch from hook, sc in each ch across, ch 1, turn.
Row 2: sc in first sc, 1 sc in each sc across, ch 1, turn.
Row 3–7: Repeat row 2. Fasten off.
Inside (the rainbow part): begin with blue (or whatever the colour of bottom layer of cake is)
(In case you’re interested, here’s a simple tutorial demonstrating changing colour at the end of row.)
Row 1 (wrong side): ch 12, sc in second ch from hook, sc in each ch across.
Row 2 (right side): join white, fasten off blue. With white, ch 1. In back loop only, sl st in each sc across.
Row 3 (wrong side): join yellow (or the colour of middle layer of cake), fasten off white. with yellow, ch 1. In front loop only, sc in each st across.
Row 4 (right side): join white, fasten off yellow. With white, ch 1. In back loop only, sl st in each sc across.
Row 5 (wrong side): join orange (or the colour of top layer of cake), fasten off white. with orange, ch 1. In front loop only, sc in each st across. Fasten off.
Candle: with grey
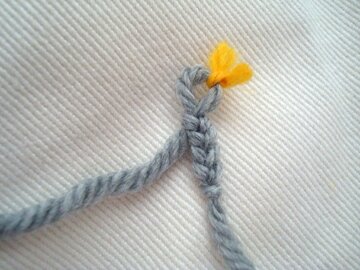
Leaving a 6″ tail, ch 4. Remove hook from loop, tie a short length of yellow yarn to loop, then pull the loop close.
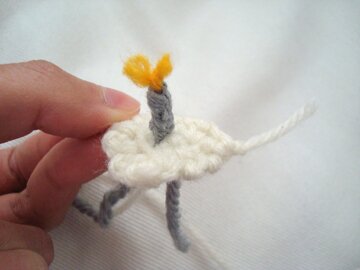
Leaving a 6″ tail, cut off yarn. With a needle, thread tail through the 4 ch just made, down to the first ch. Now there are 2 yarn tails at the bottom of the candle. Pull the 2 tails through adjacent stitches in the top piece, then tie them together on the backside, like so…
When the whole cake slice is assembled, fray the short yellow yarn tails that are supposed to be the flame. With a drop of white glue, roll the yarn tails together between your thumb and index finger. You might have to clamp it with a clothespin for a few minutes for the glue to dry.
Assembly:
1. Sew the long side of the rainbow part to the bottom of cake slice, along the 2 side edges of the bottom piece, with half the rainbow part sewn on one edge and the other half sewn on the other edge.
2. Sew the top of the cake slice to the rainbow part.
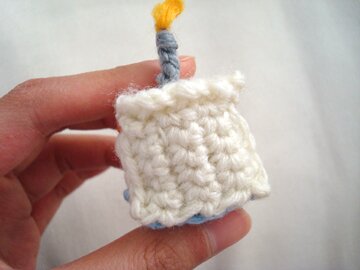
3. Sew the back of the cake slice to the rainbow part and the bottom, leaving the top edge open. The back is sewn on sideways, like so…
4. Stuff the cake slice through the open top edge, then continue to sew it close. (The top edge of the back piece is sewn to row 4 of the top piece — the row before the ruffles.) Weave in ends.
And here we have it, a rainbow cake slice! 😀
I think it would make a great fridge magnet, either with a magnet permanently attached, or using this trick I mentioned at the end of the tater tot post.
Thank you so much for joining me in my blogiversary festivities! I hope you enjoyed them. As usual, if you have questions or feedback about any of my patterns, please feel free to leave a comment or send me a note, I’d love to hear from you!
Have a lovely evening, everyone!

