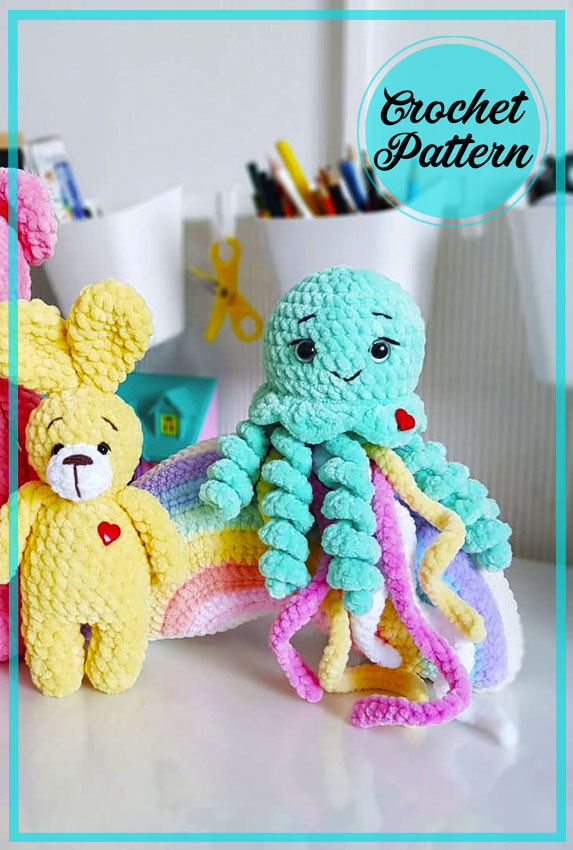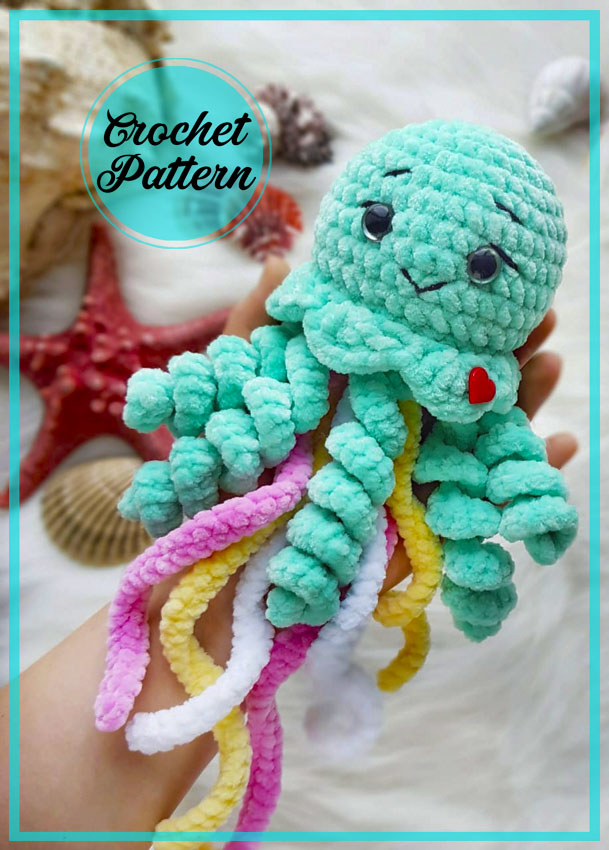
I shared a pretty cute jellyfish pattern before. However, I couldn’t decide whether it was an octopus or a jellyfish. However, I still want to share it because I really like the pattern. The most impressive part of such patterns, especially made using velvet thread, is the quality of the thread. Thread quality is really important in velvet amigurumi dolls. As you can see in the picture, it has an extremely bright and attractive color. You can take a look at the categories to review other crochet amigurumi patterns. Crochet baby Octopus pattern. Using these materials, the finished toy is 6” (15cm).
Designer: @chirka_toys
Etsy: https://www.ravelry.com/patterns/library/octopus-baby-plush-toy
Languages:
– English (American terms)
You can crochet a toy from any other yarn, but you will have to choose the size of the hook and yarn by yourself.
Materials:
1. Yarn Himalaya Dolphin baby 100g/120m or analogue;
2. Hook size 3,5 mm;
3. Safety eyes size 12 mm;
4. Holofiber filler;
5. Yarn YarnArt Jeans 50g/160m for muzzle design;
6. Scissors, needle for sewing.
Abbreviations:
MR – magic (amigurumi) ring
Ch – chain stitch
Slst – slip stich
Sc – single crochet
Dc – double crochet
Inc – increase (2 sc in one st)
Dec – decrease (crochet next 2 st together)
(________)*6 – repeat instruction in brackets 6 times
LOWER PART
1. 6sc in MR
2. 6inc (12)
3. 1sc, inc (18)
4. 2sc, inc (24)
5. 3sc, inc (30)
Crochet slst, cut the thread, fasten it.
LEGS (TENTACLES)
Crochet the tentacles directly into the lower part of the jellyfish. Insert the hook between the 3rd and 4th rows, in the place where the marker passed (the beginning of the row), i.e. legs should go in a circle at the distance of 2 rows from the edge of the “circle”. Insert the hook, grab the thread, crochet 1ch and fasten the end of the thread immediately, crochet further:
30ch, 30inc (the first leg/tentacles turned out)
Without skipping loops, immediately crochet 3sc, completely grabbing the stitches of our “circle”.
30ch, 30inc, 4sc
30ch, 30inc, 3sc
30ch, 30inc, 4sc
30ch, 30inc, 3sc
Connect to the beginning of the row using slst. Cut the thread, fasten it
Next, make the chain, starting from the second chain from the hook crochet slst along whole length into each chain. Cut the thread, leave a small tail. Such chains are needed to be 6 pieces of different lengths and colors.
Fasten each chain in the center of the “circle” with tails. Pull out the tails at the distance of 1sc and tie 2-3 knots on the wrong side. The lower part of the jellyfish is completely ready.
HEAD (BELL SHAPE BODY) +
“SKIRT”
1. 6sc in MR
2. 6inc (12)
3. 1sc, inc (18)
4. 2sc, inc (24)
5. 3sc, inc (30)
6. 4sc, inc (36)
7-10. 36sc (4 rows)
11. 4sc, dec (30)
Insert the safety eyes between 8th and 9th rows. The distance between the eyes is 4sc. 12. 30sc and connect this row the lower part and the head. Grab with the hook the loops of both parts and crochet together sc. Stuff with holofiber. 13. Crochet the “skirt”. 1sc, skip 1 st of the previous row, 5dc in one stitch, skip 1 st, 1sc, 5dc in one stitch, etc.
At the end of the row, 2 loops will turn out to be “excess”, in order to avoid this skip not 1sc but 2 a couple of times. It will be invisible. Finish with slst, cut the thread, fasten and hide it.
Embroider a mouth, eyelids and eyebrows with yarn YarnArt Jeans. If you want, you can make a little eye tightening.
Congratulations, your Jellyfish is ready!
On the photos of your Jellyfish, mark me as the author of the pattern @chirka_toys

